General Journal Entry
General Journal Entry
From Financial group, select General Journal Entry.
.PNG)
To make a journal entry follow the steps below:
- Select the journal entry date from the date field at the top of the form.
- Add the general journal line items as follows:
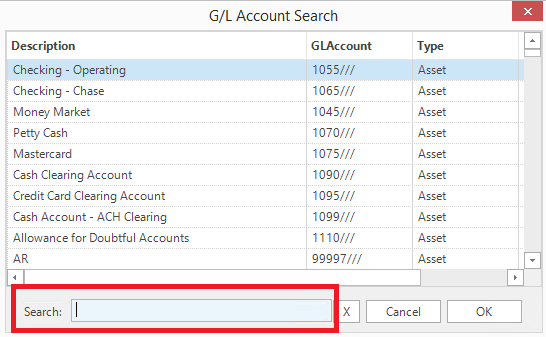
- Select the GL Account by clicking on the button to the right of the Account Number field. Find the desired GL Account by typing the account number or account description
- until it is in focus, then click OK.
- Tab to the Memo field and enter an appropriate descriptive memo.
- Tab to the Debit Amount or Credit Amount field to enter the amount of the debit or credit for the line item.
- Review the line item and then tab out of the Credit Amount field . The line item will be moved to GL panel at the top of the form.
- Continue adding GL line items until complete and the journal entry is in balance. As a convenience, the bottom of the form displays the amount necessaty to balance the journal entry.
- The Post J/E button will only be enabled, if the journal entry is in balance. Click the Post J/E button to commit the General Journal Entry.
For your convenience all of the action buttons are displayed on the Tool Bar and at the bottom ofn the Jornal Entry form.
- You may also Post J/E and set as a template should you need to use this partilucar journal entry in the future. It will save time as you can click on the 'Load Templates' button and only change the figures.
Search Journal Entries
To search for General Journal Entries launch the General Journal Entry form as described above. Click the Search G/L Entry button.
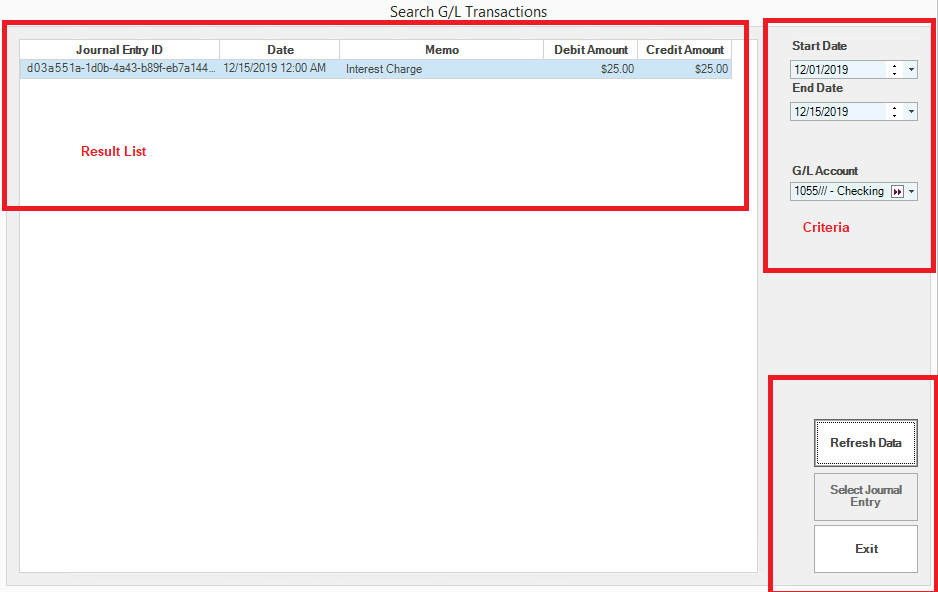
To find a specific transaction, select the criteria. Options include a date range and specific GL account. Once the criteria have been selected, click Refresh Data. If there are General Journal entries which meet the criteria, they will be displayed in the Results List. Click on the desired entry, then click the Select Journal Entry button. The selected entry will be displayed in the General Journal Entry form. Once it is displayed, the following options are available:
- Post. Click Post J/E to post the journal entry again.
- Modify and Post. Change the journal entry and post. This is useful for recurring journal entries. For recurring journal entries, change the date and then click Post J/E and edit the line items.
- Reverse Journal Entry. To reverse a journal entry, click on the Reverse G/L entry button. The GL Accounts and memo fields will remain unchanged but the debits and credits will be reversed. Change the date, if required, then click Post J/E. This function is useful for routine end of period reversals or for corrections.
Import G/L Entry
General Journal Entries can be imported from a comma delimited file (CSV). This is convenient for posting journal entries generated by third party programs.
The file structure from the import file has four columns:
- Account. This is the GL Account Number
- Debit This is the debit amount. There must be a value in this column. Negative values are not permitted.
- Credit This is the credit amount. There must be a value in this column. Negative values are not permitted.
- Description. The description will be used for the memo field in the journal entry.

To import a journal entry file, click on the Import G/L Entry button. Navigate to and select the file to be imported. Click Open. The contents of the file will appear in the journal entry window. Select the Journal Entry Date and then click Post J/E.
Note: If for any reason the journal entry is not in balance, the Post J/E button will not be enabled.